

Welcome to the Nikon D3400 manual. This comprehensive guide helps you master the camera’s features, designed for both beginners and enthusiasts. Learn to capture stunning photos effortlessly.
1.1 Key Features of the Nikon D3400
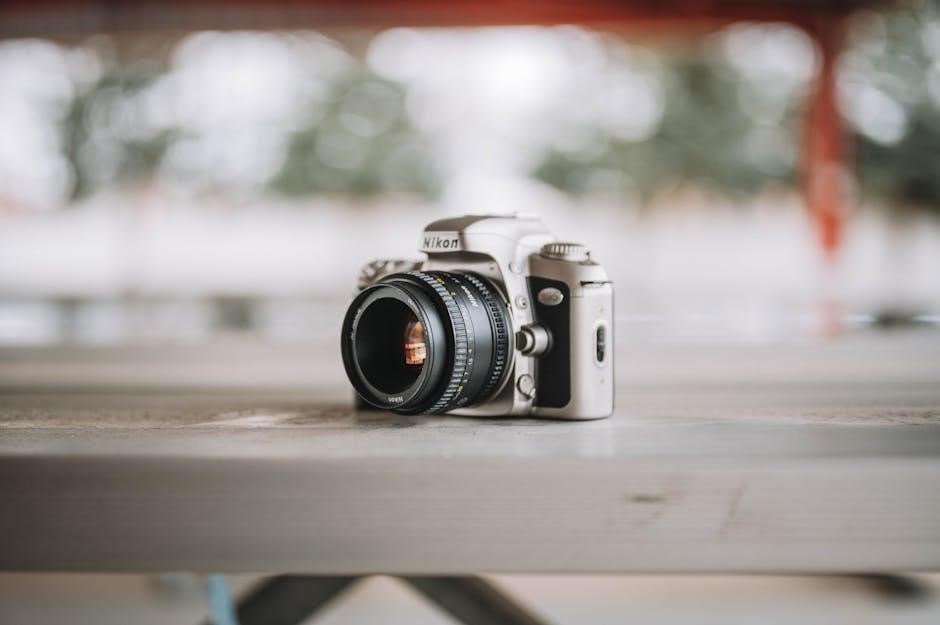
The Nikon D3400 is a high-performance DSLR camera featuring a 24.2MP APS-C CMOS sensor and EXPEED 4 image processor, delivering sharp images and vibrant colors. It offers an ISO range of 100-25600 for excellent low-light performance. The camera includes 11 autofocus points for precise subject tracking and a 3-inch LCD screen for easy composition. With Full HD 1080p video recording and a built-in Guide Mode, it’s ideal for beginners and enthusiasts alike.
1.2 Target Audience for the Nikon D3400
The Nikon D3400 is designed for beginners and hobbyist photographers seeking an affordable yet powerful DSLR. It’s ideal for those new to photography, offering intuitive controls and automatic modes. The camera also appeals to enthusiasts looking for a lightweight, versatile option. Photography students and casual shooters will appreciate its ease of use and creative potential. Whether capturing family moments or experimenting with artistic styles, the D3400 is a great starting point for mastering photography skills.
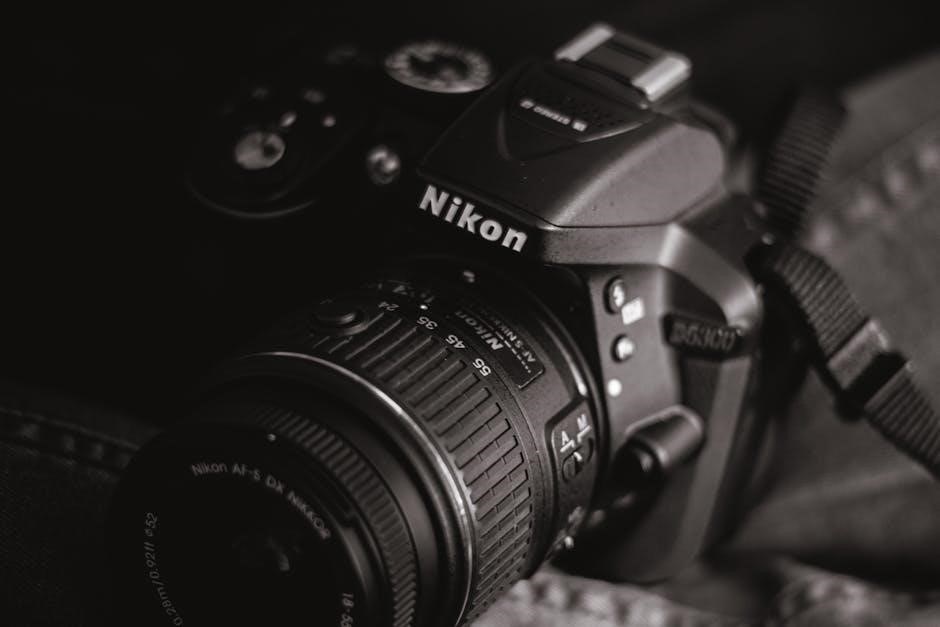
Camera Anatomy: Understanding the Parts
Familiarize yourself with the Nikon D3400’s key components: mode dial, shutter release, LCD screen, and viewfinder. Understanding these parts is essential for effective camera operation and control.
2.1 External Controls and Buttons
The Nikon D3400 features a variety of external controls designed for intuitive operation. The shutter release button is located on the top right, alongside the zoom control for precise framing. The mode dial on the top left allows quick access to shooting modes. On the rear, the multi-selector and OK button simplify menu navigation, while the info button toggles LCD displays. The live view button enables video and live view modes, and the delete button helps manage photos during playback. These buttons provide seamless control over camera settings and functions.
2.2 Lens and Mount Compatibility
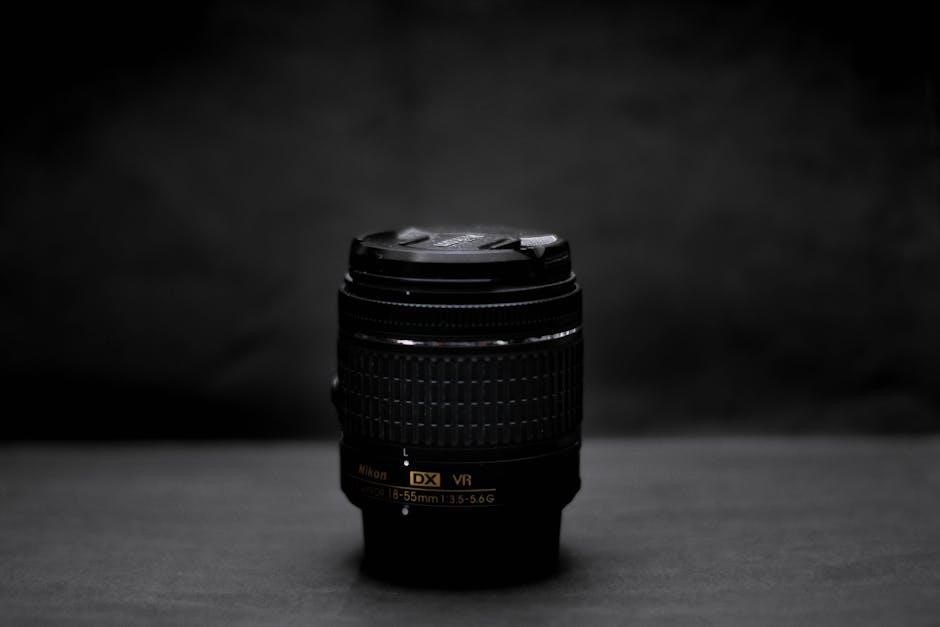
The Nikon D3400 is compatible with Nikon’s F-mount lenses, offering versatility for photographers. It supports AF-P and AF-S lenses for smooth autofocus and quiet operation. The camera is optimized for DX-format lenses but can also use FX-format lenses in DX crop mode. Popular choices include the kit lens (18-55mm) and prime lenses like the 35mm f/1.8G. For compatibility, ensure lenses are AF-P or AF-S; older MF lenses require manual focus. Always consult the manual or Nikon’s website for the full list of compatible lenses.
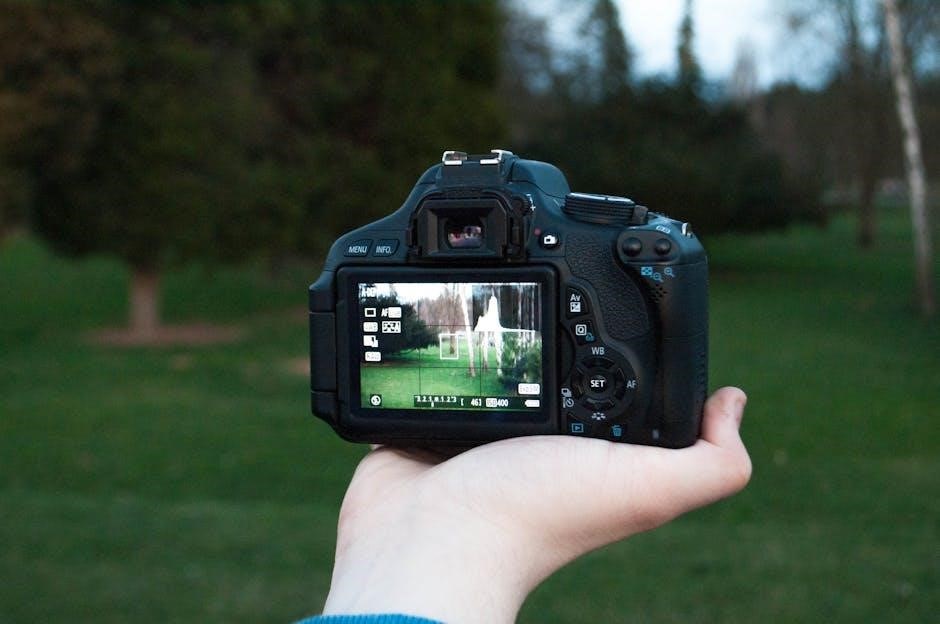
2.3 Viewfinder and LCD Screen
The Nikon D3400 features a bright optical viewfinder with 95% frame coverage, providing an accurate preview of your shot. The 3-inch fixed LCD screen displays images and settings with clarity. Use the viewfinder for precise composition and the LCD for reviewing photos and navigating menus. The LCD is not touch-sensitive but supports image playback, histogram, and settings adjustments. For eye-level shooting, rely on the viewfinder, while the LCD offers convenience for reviewing and adjusting camera settings on the go.
Getting Started with the Nikon D3400
Begin by unpacking and inspecting your camera. Charge the battery, insert a memory card, and familiarize yourself with the external controls. Power on the camera to start exploring its features and settings.
3.1 Unpacking and Initial Setup
Welcome to your new Nikon D3400! Carefully unpack the camera and accessories, ensuring all items are included. Charge the battery using the provided charger until the indicator turns green. Insert a memory card into the slot, ensuring it clicks securely into place. Attach the lens by aligning the mounting index and twisting gently. Power on the camera to begin exploring its features. This comprehensive guide will help you navigate setup and beyond with ease.
3.2 Charging and Inserting the Battery
Begin by charging the Nikon D3400 battery using the provided MH-24 charger. Plug the charger into a power source and ensure the battery is properly seated until the charging lamp glows. Once fully charged, the lamp will turn off. To insert the battery, open the compartment on the bottom of the camera, align the battery contacts, and gently push until it clicks into place. Ensure the compartment is securely closed before use. Avoid overcharging to maintain battery longevity.
3.4 Memory Card Installation and Format
To install a memory card in your Nikon D3400, open the card slot cover located on the bottom of the camera, near the battery compartment. Insert the SD, SDHC, or SDXC card with the label facing up, ensuring it clicks securely into place. Close the cover tightly. Before use, format the card via the menu system: go to the Setup Menu, select Format, and confirm. Formatting deletes all data, so ensure your photos are backed up. Use a high-speed card for optimal performance and avoid using cards between multiple cameras without reformatting. After formatting, the camera will only display unprotected images.
Camera Modes Explained
Explore the Nikon D3400’s camera modes, such as Auto, Scene, and Manual, designed to simplify or enhance your photography experience with ease and precision.
4.1 Auto Mode for Beginners
Auto Mode is perfect for newcomers, letting the camera handle settings like exposure, focus, and ISO. Simply point and shoot for sharp, well-lit photos. The camera automatically adjusts to the scene, ensuring great results with minimal effort. Use the viewfinder or Live View to frame shots. This mode is ideal for learning the basics before exploring manual controls. It’s a hassle-free way to capture stunning images while getting familiar with your Nikon D3400.
4.2 Manual Mode for Advanced Users
Manual Mode offers full control over camera settings, allowing advanced users to adjust aperture, shutter speed, and ISO for precise results. This mode is ideal for capturing specific effects or artistic visions. Users can experiment with depth of field, motion blur, and lighting to enhance creativity. While it requires a deeper understanding of photography basics, Manual Mode provides unparalleled flexibility. It’s perfect for those seeking to push their skills and achieve professional-quality images with the Nikon D3400.
4.3 Scene Modes and Special Effects
Scene Modes and Special Effects enhance creativity by optimizing settings for specific situations. Modes like Portrait, Landscape, and Night Portrait adjust camera settings for ideal results. Special Effects, such as Super Vivid and Pop, add artistic styles to images. These features simplify capturing stunning photos in various conditions, offering convenience for users of all skill levels. Experiment with these options to explore creative possibilities and achieve unique image styles effortlessly with the Nikon D3400.

Custom Settings and Personalization
Customize your Nikon D3400 to suit your preferences. Personalize shooting settings, button assignments, and menu configurations for tailored control. Enhance efficiency and creativity with personalized options.
5.1 Customizing Shooting Settings
Customize your Nikon D3400 to match your shooting style. Adjust settings like ISO sensitivity, white balance, and autofocus modes to suit your creative vision. Personalize exposure compensation and noise reduction for optimal results. Access these options through the shooting menu, where you can fine-tune settings for various lighting conditions and subjects. Save your preferences for quick access, ensuring a seamless photography experience tailored to your needs. This feature enhances both convenience and artistic control, making every shot unique and professional.
5.2 Adjusting Autofocus and Metering
Customize your Nikon D3400’s autofocus and metering settings for precise control. Choose from AF-A, AF-C, or AF-S modes to suit your subject’s movement. Adjust metering modes, such as Matrix, Center-Weighted, or Spot, to ensure accurate exposure. Fine-tune autofocus sensitivity and tracking for sharp results. Use the camera’s metering lock feature to maintain exposure consistency. These adjustments empower you to adapt to various lighting conditions and subject behaviors, delivering professional-grade photos with ease and precision.
5.3 Setting Up Custom Menus
Personalize your Nikon D3400 experience by creating custom menus tailored to your needs. Access the custom menu setup via the camera’s menu system and select options like frequently used shooting modes, autofocus settings, or image quality preferences. Assign your most-used functions to the “My Menu” section for quick access. This feature streamlines your workflow, allowing you to focus on capturing moments without navigating through multiple options. Customize and organize your menu to enhance efficiency and convenience during shoots.
The Shooting Menu
The Shooting Menu offers essential settings for capturing images, including image quality, ISO sensitivity, and white balance. Customize settings to suit your photography style and preferences.
6.1 Image Quality and Size Settings
The Nikon D3400 allows you to adjust image quality and size to suit your needs. Choose from Fine, Normal, or Basic JPEG compression levels for varying file sizes and quality. Image size options include Large (L), Medium (M), and Small (S) settings, which determine resolution. For higher versatility, enable RAW format capture alongside JPEG. This setting saves uncompressed data, ideal for advanced editing. Adjusting these settings balances file size and image detail, ensuring optimal results for your photography goals. Always review these settings before shooting to ensure they match your creative vision.
6.2 White Balance and ISO Settings
The Nikon D3400 offers precise control over White Balance and ISO settings to enhance image accuracy. White Balance options include Auto, Daylight, Incandescent, Fluorescent, Cloudy, and Shade, allowing you to match lighting conditions. ISO sensitivity ranges from 100 to 25,600, enabling low-light shooting. Lower ISOs reduce noise, while higher ISOs capture images in dim conditions. Use Auto ISO for convenience or manual adjustment for creative control. Adjusting these settings helps achieve accurate colors and optimal exposure in various lighting environments, ensuring sharper and more detailed photos. Experiment with these settings to refine your results.
6.3 Noise Reduction and Picture Controls
The Nikon D3400 features noise reduction options to minimize grain in low-light photos. High ISO Noise Reduction (HI) and Long Exposure Noise Reduction (LN) help reduce digital artifacts. Picture Controls allow customization of image settings like sharpening, contrast, and color. Options include Standard, Neutral, Vivid, Monochrome, and more. These adjustments let you tailor the look of your photos to suit your style or subject. Experiment with these settings to enhance detail and achieve desired visual effects in your images.

The Playback Menu
The Playback Menu lets you review, delete, and manage photos. Options include creating slideshows, rotating images, protecting files, and rating photos for easy organization and sharing.
7.1 Reviewing and Deleting Photos
To review photos, press the playback button. Use the left and right arrows to scroll through images. For deleting, select the trash can icon on the LCD screen. Confirm deletion or cancel. Multiple photos can be deleted at once via the ‘Select to delete’ option. Be cautious not to format the memory card, as it erases all images permanently. Always review photos before deleting to avoid losing important shots accidentally.
7.2 Slideshow and Image Rotation
To create a slideshow on the Nikon D3400, go to the Playback menu and select ‘Slideshow.’ Choose images or folders to include. Set the interval between photos and apply transitions if desired. Start the slideshow by pressing the OK button. For image rotation, select the photo, then press the playback zoom out button (-Thumbnail) to access rotation options; Use the multi-selector to rotate the image left or right. These features are convenient for reviewing and sharing photos directly on the camera.
7.3 Protecting and Rating Images
To protect images on the Nikon D3400, select the desired photo in playback mode and navigate to the ‘Protect’ option in the Playback menu. This prevents accidental deletion. For rating images, use the multi-selector to assign ratings (e.g., 1-5 stars) in the Playback menu under ‘Rate Images.’ This feature helps organize and filter photos based on quality or preference. Protected and rated images are easily managed, enhancing your workflow and ensuring important shots are preserved.
Autofocus and Metering Modes
The Nikon D3400 offers precise autofocus modes, including Single AF for stationary subjects and Continuous AF for moving objects, ensuring sharp images in various shooting scenarios.
8.1 Single AF, Continuous AF, and Manual Focus
The Nikon D3400 features three primary focus modes: Single AF, Continuous AF, and Manual Focus. Single AF is ideal for stationary subjects, locking focus instantly. Continuous AF tracks moving subjects, adjusting focus dynamically. Manual Focus allows precise control using the lens ring, useful in low-light or complex compositions. Each mode caters to different shooting scenarios, enabling photographers to capture sharp images effortlessly. Understanding these modes enhances creativity and ensures optimal results in various conditions.
8.2 Understanding Metering Modes
The Nikon D3400 offers three metering modes to help achieve accurate exposure. Matrix Metering divides the scene into zones for balanced exposure. Center-Weighted Metering prioritizes the center area, ideal for portraits. Spot Metering measures a small area for precise control in high-contrast situations. Each mode tailors exposure to different lighting conditions, ensuring versatility and creativity in various photography scenarios.

Lenses and Accessories
The Nikon D3400 is compatible with a wide range of F-mount lenses, including the AF-P DX NIKKOR 18-55mm kit lens and other optional Nikkor lenses. Accessories like external flash units, remote controllers, and camera bags enhance functionality and convenience for photographers. The camera also supports additional gear for specialized shooting needs, ensuring versatility for both beginners and enthusiasts.
9.1 Compatible Lenses for the Nikon D3400
The Nikon D3400 is compatible with a variety of F-mount lenses, including AF-P DX NIKKOR lenses like the 18-55mm kit lens. It also supports other DX and FX lenses, offering flexibility for different photography needs. Prime lenses, such as the AF-P DX NIKKOR 35mm f/1.8G, and zoom lenses, like the AF-P DX NIKKOR 70-300mm f/4.5-6.3G ED, are popular choices. These lenses provide sharp images and versatile focal lengths for capturing portraits, landscapes, and more, making them ideal for both beginners and enthusiasts.
9.2 Using Flash and External Lighting
The Nikon D3400 features a built-in pop-up flash for added illumination in low-light conditions. For more advanced lighting, you can use external Speedlights like the SB-300 or SB-500 via the camera’s hot shoe. These flashes offer greater control over lighting and can be angled for bounce flash. Additionally, wireless flash triggering is possible with compatible units. External lighting enhances creativity, allowing for better subject separation and mood creation in your photos. Experiment with flash angles and diffusers for softer, more professional results.
Advanced Shooting Techniques
Explore advanced methods like HDR, bracketing, and RAW shooting to enhance your photography. These techniques help capture high-contrast scenes and precise exposures for professional results.
10.1 Shooting in RAW Format
Shooting in RAW format captures maximum image data, offering greater flexibility in post-processing. The Nikon D3400 saves RAW files as .NEF, retaining full sensor data. This allows for precise adjustments to exposure, white balance, and color profiles without degrading image quality. Enable RAW format via the Shooting Menu under Image Quality. Note that RAW files are larger and require external software for editing. Use RAW for high-contrast scenes or when seeking professional-level edits.
10.2 Using HDR and Bracketing
HDR (High Dynamic Range) combines multiple shots to capture a wider tonal range. On the Nikon D3400, enable HDR in the Shooting Menu under HDR (High Dynamic Range). Select the number of shots and exposure intervals. Bracketing allows capturing multiple exposures of the same scene. Use the BKT button to set bracketing parameters. This is ideal for scenes with high contrast, ensuring detail in both highlights and shadows; HDR enhances color and detail, while bracketing provides flexibility for post-processing.

Managing Your Photos
Efficiently organize and enhance your images using Nikon’s software. Transfer photos via USB or card reader, then edit and catalog them for easy access and sharing.
11.1 Transferring Images to a Computer
To transfer photos from your Nikon D3400 to a computer, use a USB cable or a memory card reader. Connect the camera directly via USB, ensuring it’s in “Mass Storage” or “PTP” mode. Alternatively, insert the memory card into a card reader and transfer files to your computer. Nikon’s ViewNX-i software can also assist in importing and organizing images seamlessly. Always ensure the camera is properly recognized by your computer for a smooth transfer process.
11.2 Organizing and Editing Photos
After transferring images to your computer, organize them into folders by date or event. Use Nikon’s ViewNX-i software to rename files and create albums. For editing, Nikon Capture NX-D offers tools to adjust exposure, color balance, and sharpness. Basic edits like cropping and straightening can also be done in-camera using the Retouch Menu. For advanced editing, export images to third-party software like Adobe Lightroom or Photoshop. Always save edited files in a separate folder to preserve originals.
Troubleshooting Common Issues
Check memory card compatibility and formatting issues. Ensure image stabilization is enabled for blurry photos. Verify autofocus settings for sharpness problems. Restart the camera to resolve glitches.
12.1 Resolving Battery and Charging Problems
Ensure the battery is properly inserted and contacts are clean. Use the Nikon-supplied charger to avoid compatibility issues. If the battery doesn’t charge, check the power source. Update the camera firmware to resolve drain issues. Reset the camera settings to factory defaults. Calibrate the battery by letting it drain fully before charging. If problems persist, contact Nikon support for assistance. Always use genuine Nikon batteries for optimal performance and reliability.
12.2 Fixing Error Messages and Lens Issues
If an error message appears, restart the camera and ensure the lens is properly attached. Clean the lens contacts with a soft cloth. For “Lens not recognized” errors, reattach the lens and turn the camera on. If focusing issues occur, reset autofocus settings or try manual focus. Check for firmware updates to resolve compatibility problems. If errors persist, consult the user manual or contact Nikon support. Always use Nikon-approved lenses to prevent communication issues and ensure optimal performance.
Maintenance and Care
Regularly clean the camera and lens with a soft cloth to prevent dust buildup. Store the D3400 in a dry, cool place to avoid moisture damage. Always handle the camera with care to avoid scratches or drops. Use a protective case for transportation and avoid exposure to harsh chemicals or extreme temperatures to ensure longevity and optimal performance.
13.1 Cleaning the Camera and Lens
Use a soft, dry cloth to gently wipe the camera body and lens. For stubborn smudges, slightly dampen the cloth with water, but avoid liquids directly on the lens. A microfiber cloth or lens cleaning tissue is ideal for the lens. Use a blower brush to remove loose dust before wiping. Avoid harsh chemicals or abrasive materials that might scratch surfaces. Clean the lens in a circular motion, starting from the center. Regular cleaning ensures clarity and prevents damage to your Nikon D3400’s optics.
13.2 Updating Firmware
Update your Nikon D3400’s firmware to access new features, bug fixes, and performance improvements. Check the current firmware version in the camera menu under Setup Menu > Firmware Version. Visit Nikon’s official website to download the latest firmware. Insert a fully charged battery and a formatted memory card. Follow on-screen instructions to complete the update. Avoid interrupting the process to prevent damage. After updating, restart the camera to ensure the new firmware is applied. Regular updates keep your camera optimized for best performance.
Mastering the Nikon D3400 unlocks endless creative possibilities. Explore its features, practice techniques, and capture stunning images. Happy shooting!
14.1 Maximizing Your Nikon D3400 Experience
To maximize your Nikon D3400 experience, experiment with its modes, explore external accessories, and refine your post-processing skills. Regular practice enhances your understanding of lighting and composition. Keep exploring new techniques to unlock the camera’s full potential and capture memorable moments with precision and creativity. Happy shooting!